The idea of partitioning a hard drive
makes sense when you need to utilize your disk space in the most
astute manner. Even if you buy a new hard drive, the first thought
that comes to mind is to create multiple spaces for storing files
according your convenience. If you keep data on one partition, the
other partition can be used for storing backups. Each logical
partition on the drive behaves as if it were a separate drive in your
system. This organizational trick proves to be worthwhile for
ensuring that the tasks executed on one entity does not affect the
entities stored on other part of the drive.
Mac OS X comes with a built-in tool
'Disk Utility' that allows performing different partitioning
operations on a Mac hard drive. The later versions of Disk Utility
(bundled with Mac OS X 10.5 or later) enables you to carry out
partitioning without losing data stored on the hard drive. You often
require repartitioning the drive to install a different version of OS
X while still maintaining your existing OS X installation. This way,
you can set up a dual-boot or multi-boot Mac OS X. In order to
repartition your Mac hard drive using Disk Utility, follow the given
procedure:
- Back up all data on the drive or create a disk image of your drive on an external drive. In case something goes wrong, you can restore your lost data.
- Boot from your Mac OS X Install DVD. When the menu bar appears, click ‘Utilities’ and select ‘Disk Utility’.
- In the Disk Utility window, all the physical drives and volumes in your system are listed in the left pane. Choose the hard drive to be partitioned and select the ‘Partition’ tab in the top-right corner of the window.
- Select the number of partitions you want to create in the ‘Volume Scheme’ dropdown.
- Select each partition and specify its name, format, and the desired size. You can use divider to specify the partition sizes.
- For the partition to be used as the Mac OS X startup disk, select the GUID partition scheme. Click ‘Apply’ button at the bottom.
Once the process is finished, exit the
installer and reboot your Mac normally. You will see an icon in Disk
Utility for each partition created on the hard drive. If you are
using Mac OS X Lion or OS X Mountain Lion, you can simply boot using
the ‘Recovery Partition’ to access Disk Utility.
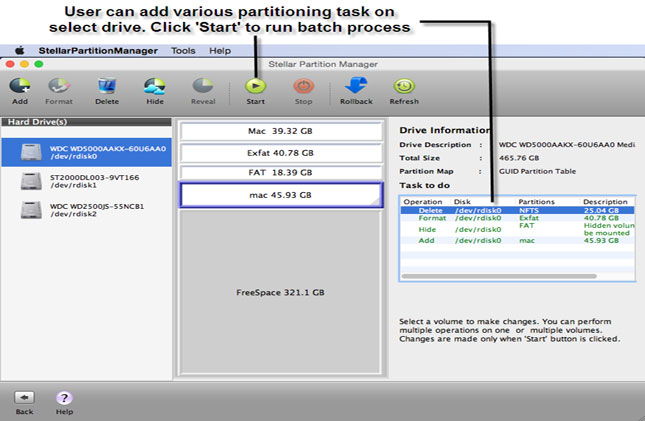
Further, there are professional
Partition Manager utilities for Mac on the market that can help you
accomplish complex disk partitioning jobs with ease. Using these
tools, you can also hide a Mac partition to prevent illicit or
unauthorized access to your confidential information. Further, they
are compatible with the latest Mac OS X Mountain Lion.


Thank you for this information!!
ReplyDelete