When the amount of data
is increased, you need to enlarge the data storage capacity of your
Mac machine by purchasing a new hard drive with its size greater than
that of the previous one. When you purchase a new hard drive (whether
internal or external), the whole memory is assigned as a single
partition. Therefore, you need to partition Mac drive into
required number of volumes in order to save different type of data
separately. Your data can be anything like, audio and video files,
professional documents, software, personal collection of pictures,
etc. Most importantly, the operating system installation requires a
separate volume.
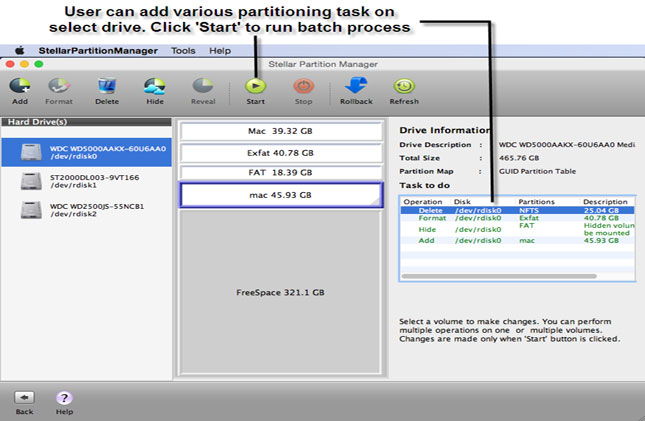
| For resolving partitioning & formatting issues on Macintosh hard drives, we recommend use of this disk manager utility. |
Sometimes, it is seen
that people install operating system on a hard drive without
partitioning. In this situation, they have to repartition the same
hard drive when more data is to be stored. Disk Utility in Mac
operating systems allows splitting the hard drive into several
volumes anytime (during and even after OS installation) without data
loss. However, people have been notifying about a “Partition
Failed” error in Mac that is encountered while attempting to
repartition the hard drive. This error displays a message that
states:
“Couldn’t modify
partition map because file system verification failed.”
Therefore, it is
necessary to follow precautionary steps to resize the hard drive with
single partition and to create a new one.
- Launch to Disk Utility (Applications-> Utilities folder-> Disk Utility).
- In the left pane, select the target hard drive, and simultaneously go to the Partition tab in the right pane.
- Under Partition Layout area, click the graphical structure of the hard drive.
- Click and hold the bottom-right corner (where you can see three diagonal lines) of the drive structure, and drag the partition upward for shrinking its size.
(You can resize an existing Mac partition only if the hard drive is using GUID Partition
Table as the Partition Map Scheme. Therefore, before attempting to
resize it, first make sure the Partition Map Scheme used by the hard
drive is GUID Partition Table; check it under First Aid tab.)
If hard drive throws a
“Partition Failed” error, then move to Single User Mode
and follow the steps mentioned below.
- Restart the Mac, immediately press and hold Command + S keys to boot in Single-user mode.
- In the command prompt, run the command: /sbin/fsck/ -fy
- When the process is finished, type exit and reboot normally.
- Launch Disk Utility, Select the Disk and click ‘Verify Disk’.
Now, again go to the
Partition tab and try to partition Mac drive normally. Drag
the existing partition upward to trim some free space from it. Now,
use the trimmed space to create another Mac volume. Under Volume
Information area, specify a Name, choose a file system Format, and
size for the newly created partition. It is recommended to choose Mac
OS Extended (Journaled) format as the file system format for the
volume to make it boot enabled.
2:51 AM - By Stuart Bell
11


11 comments: